
DIY: Cable pom-pom beanie
"If you paint, write, do mosaics, knit - if it's solving that part of your brain saying, 'I need to do this,' you've won."
-Albert Brooks
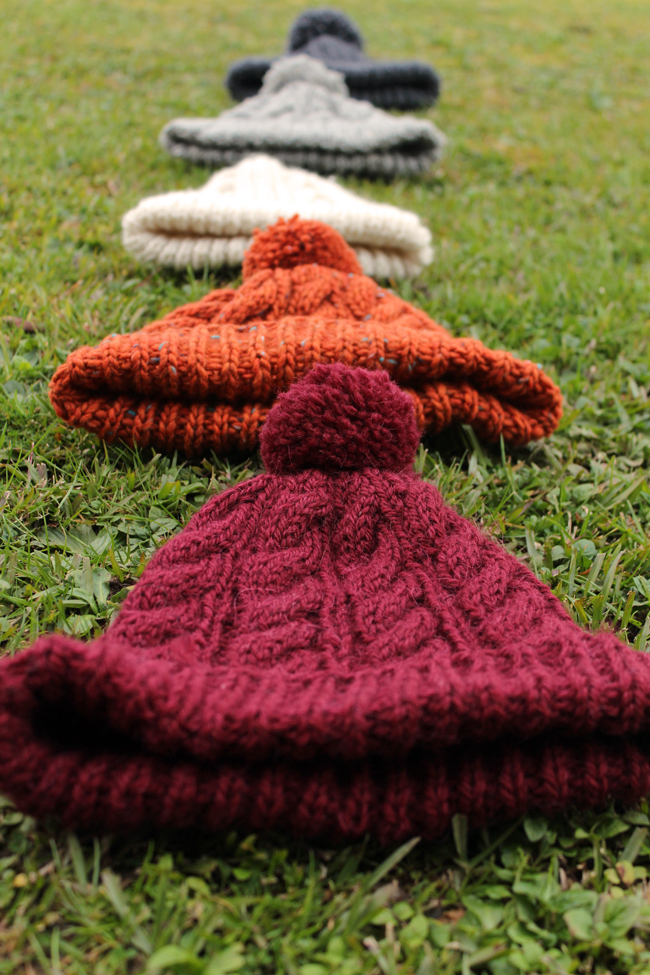
Some of you may have noticed my DIY obsession this winter; the pom-pom beanie. It arose out of being inspired
(mostly by Zoella and Perrie Edwards) and figuring out that I wanted a cabled pom-pom beanie for winter. I can
get super fusy when I've got a certain image in my head (instead of the usual impulse purchases) and I
couldn't find in a store exactly what I wanted. Luckily I had book marked a cable beanie pattern so tried it out,
creating the first beanie (#5 posted about previously here and here). But then Mum and Ellen spotted them, and
asked if I could make them one (since I was just sitting on the couch watching too much TV and tumblring in the
Uni holidays). Luckily the local wool store was having a sale so I picked up some more wool and knitted away.
Earlier this week I was thinking about how after making this collection of beanies it would be just my luck that it
would be totally out of fashion for next winter. So I was super excited when checking out the the Twenty-Seven
Names winter 2014 photos on foureyes from NZfashion week to see there was a beanie like this on one of the models!
Which would indicate that they'll still be in fashion next winter, phew! So whether you're a reader from the northern
hemisphere and planning for the coming winter, or a really organised fellow southern hemisphere dweller,
it's time to get knitting!

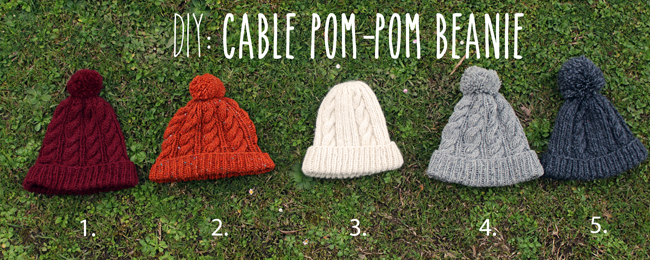
1. Tara's burgundy beanie - pattern #2
2. Tara's pumpkin beanie - pattern #2
3. Mum's bone beanie - pattern #1
4. Ellen's dove grey beanie - pattern #2
5. Tara's dark grey beanie - pattern #1
pattern #1 was the beanie pattern from I Should Have Bred Iguanas (which was pretty easy once you get your head around cabling)
then I just did a basic pompom like here.
pattern #2 was after I decided I wanted more cables instead of ribbing in between, so adapted pattern #1 and made
my own pattern for the main section after the ribbing band:
For the first round I used the pattern P1, K1, P1, K6 and repeated that all the way around (8 times per circuit).
Then for round 3: P1, K1, P1, slip off 3 stitches, K3, knit the 3 stitches from the cable back on the circular needle
(and repeat for the whole round)
When It came to decreasing (at the point the beanie is as long as you want) I did:
1. P1, K1, P1, K2together, K2, K2together,
(repeated for the whole round/8x)
2. P1, K1, P1, K4 (repeat 8x)
3. P1, K1, P1, K2together, K2together (repeat 8x)
4. P1, K1, P1, K2 (repeat 8x)
5. K2together until only 10 stitches left
Finally make a pompom, attach it, and you've got a stylin' beanie in the colour of you choice!
I used a couple of different weights of wool, but to give you an idea of how much you'll need I used about
92m of 14ply wool and 70m using 10ply wool on 40cm long 7mm circular needles (any longer and they're hard to use,
I learnt the hard way!).
Hopefully this makes sense, if you have any questions just leave them below in the comments!

P.S. Youtube is a great source if you're new to knitting (or just a bit rusty like I was), these were a couple I found helpful for
casting on, purl stitch, cabling