
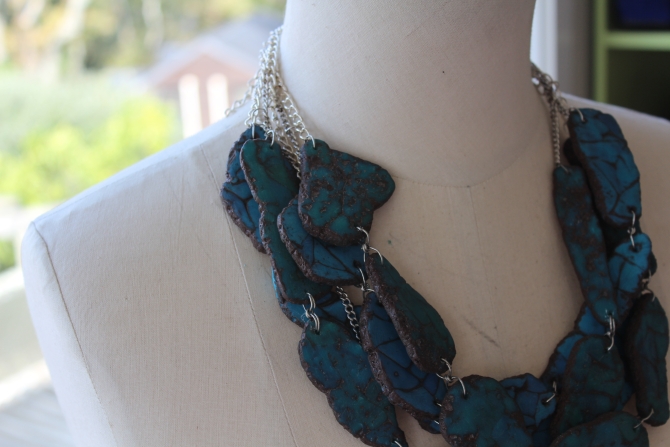
Polymer Clay DIY: Rough Stone Chunky Necklace
"What's really keeping you
here? from what you want?
from being where you want?
from being who you want?"
-Unknown
It was a while ago while watching gossip girl that I noticed the Susanna Galanis necklaces that
Serena and Charlie/Ivy wore in a few different episodes.
After falling in love however, I researched the necklaces only to find out they were well outside the student price range.
I then started the journey to make something similar of my own.
Shipping in pieces of semi-precious stone was also going to be outside my budget so I mixed multiple
polymer clay tutorials to create stone beads of my own.
I was really pleased with how they turned out, and in the end I've created multiple necklaces
that were not only within my budget, but are lighter than originals and a little more unique.
So today's post is to share the DIY process so that you could make your own cute rough stone necklace if you wish to try it out.
You will need:
- polymer clay
(2 packets for ~14 8x2xcm beads)
- paint (for veining)
- tooth pick
- chain
- jump rings and wire
- lobster clasp
- needle nose pliers
- sea/rock salt
-sand paper
Instructions:
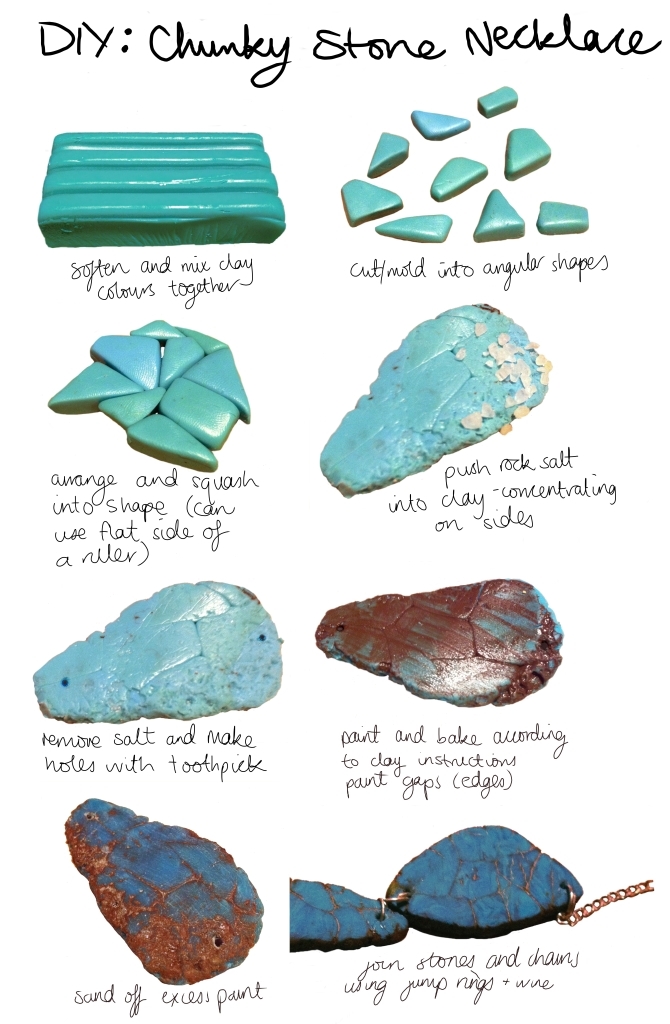
1. Soften and mix clay together
using multiple (I used 2) different coloured polymer clays gives the stone a more interesting texture to the main colour rather than
having it all one colour. I also found that if you can mix in at least one semi-transparent clay it looks much better too.
2. cut/mold into angular shapes
you can either cut it with scissors or a knife, this is to provide the groves for the paint to go into for the veining effect.
3. arrange and squash into shape
this is when you choose the major shape for each bead. fit together the segments into which ever shape you wish.
A ruler is useful for squashing it together and flattening it out more (Covering it in gladwrap/clingfilm stops the clay sticking).
4. Push rock salt into clay - concentrating on sides
This creates the texture which the paint can go into to give it a more porous/dimpled appearance.
I made sure there was a lot of indents in the sides so it looked like slices of rough stones.
5. Remove salt and make holes with tooth pick
Its important to remember to add the holes in before baking because it can be too brittle to drill into.
6. Paint and bake according to clay instructions.
After baked paint any missed patches; making sure to get into the little grooves (for veiny look)
7. Sand off excess paint
This can be a little fiddly and take a while (especially if you weren't very tidy with the painting)
It looks better if you sand off any fingerprints you've made in the clay too.
During this step your stone bead piece is revealed with the veining a texture, and will start to look more realistic.
8. Join stones and chains using jump rings and wire.
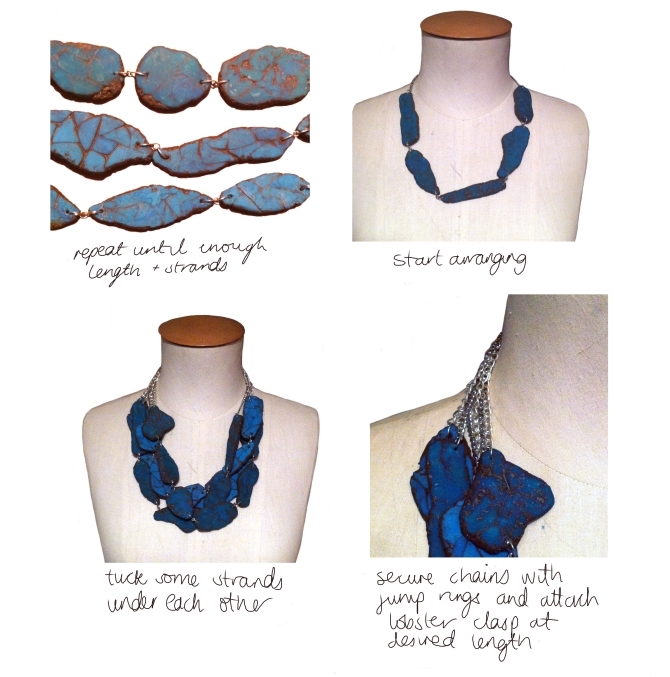
9. Repeat until you have enough strands and they are long enough for your design.
10. Start arranging strands into the design you want
11. With the multi-strand look you can tuck some strands under each other
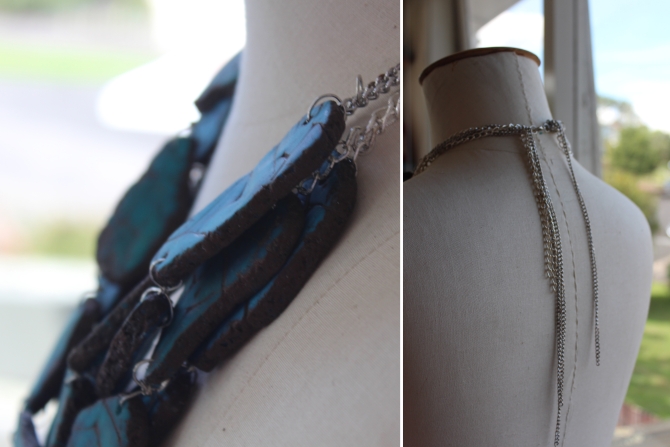
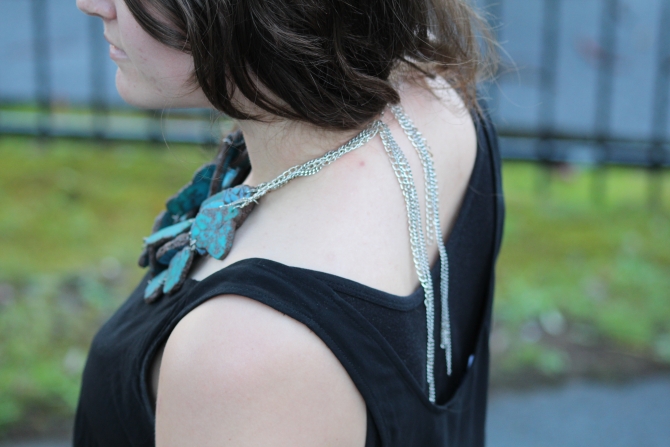
12. secure chains with jumprings and attach clasp at desired length
By connecting the chains together with the jumprings this prevents too much movement of the strands from their positions.
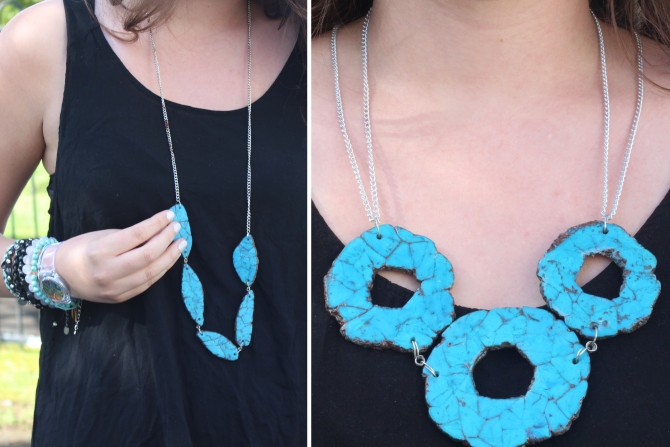
Here are some pictures of different ways you can use the DIY stone techniques:
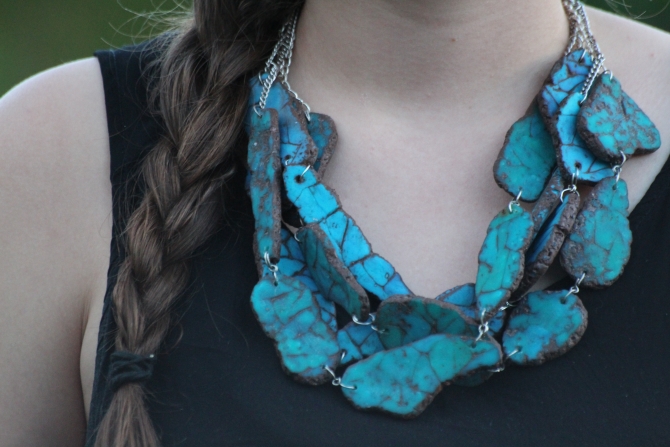
So yeah, that's how I made these necklaces after some research and experimentation.
I was pretty stoked with how they turned out!
I'd love to see any pictures if you do give it a go,
leave us a link below!!
